The text administration module is one of the most efficient tools that Ingenious.V12 makes available to you. Text modules can be written out abbreviations, text segments or even whole documents. These “Modules” are completed texts that one can use with a click. In some text modules, placeholders are included that stand for a variable content. For instance, one can enter the date in a text module or a document with the placeholder. In this way, the document always contains a current date (according to the computer calendar). The text modules are divided into four groups: Project templates (text modules as a complete project document with already integrated placeholders), document templates (text modules as a complete document with already integrated place holders, system components (text fragments with integrated placeholders and free texts (text modules for header and footer with integrated placeholders).
Placeholder
In short, placeholders stand for variable contents of texts that appear only on the printout of the document. This is how the placeholder stands for example “{address}” for the address data (street, postal code and city) of the current record. Placeholders are recognized by the brackets “{…}” which encompass the placeholder name.
Project templates
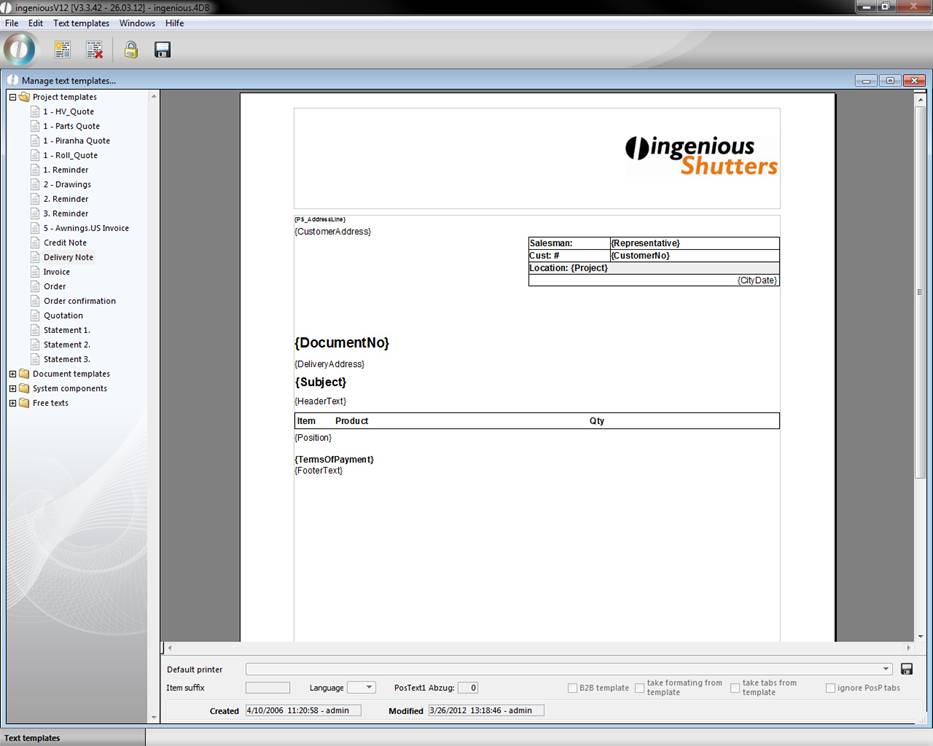
The folder “Project templates” contains all templates relevant for a project, such as reminders, quotations, invoices, credit notes, etc. These templates are prefabricated, fully useable documents that find their application in the workflow modules. Also at this point, you have new possibilities to adapt the print templates according to your individual wishes.
Item format suffix
In the “Pos. suffix” field next to the preset endings, you can define: _OC for order confirmations and _DN for delivery notes and individual suffixes for special items or system modules.
Now the approach is briefly shown in the following. Go to the column “System modules” and create a new system module “PosP_CN” with the ![]() icon. You can copy the contents of the “PosP” module as a presentation and change it as you desire. In order to be able to work on text modules, simply click on the
icon. You can copy the contents of the “PosP” module as a presentation and change it as you desire. In order to be able to work on text modules, simply click on the ![]() icon. In the example shown, the font will be shown in red and the {ItemPSP} information is omitted.
icon. In the example shown, the font will be shown in red and the {ItemPSP} information is omitted.
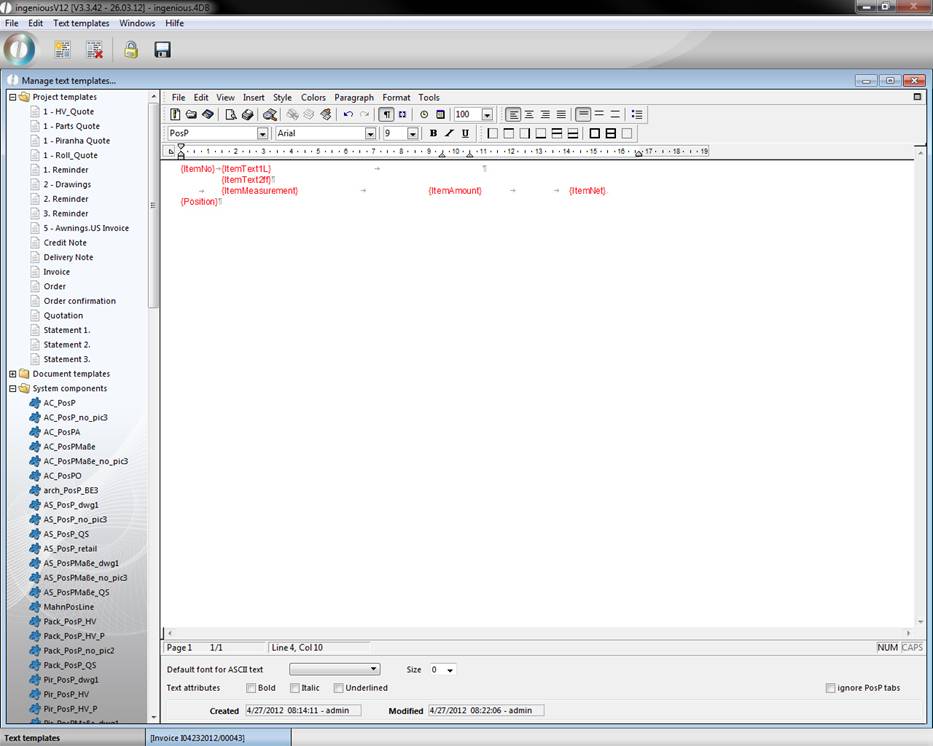
After the change is made, you save the module and switch to the “Project templates” column. Open the credit note template and simply enter “_CN” in “Pos. suffix”.
In order to check whether the settings made are applied, simply open the credit note detail view in the workflow and choose “Print Preview”. Simply click on the “Update” button and you will see that the representation of the credit contains no PP data and that the position number, measurements, amount and price are illustrated in red.
Item format prefix
In the “Items” module, you can also work with given or self-created system modules. However, prefixes are used here for the position formatting. The creation analogously occurs to the item format suffix, with the difference that the letters are placed at the beginning (i.e..: XXPosP).
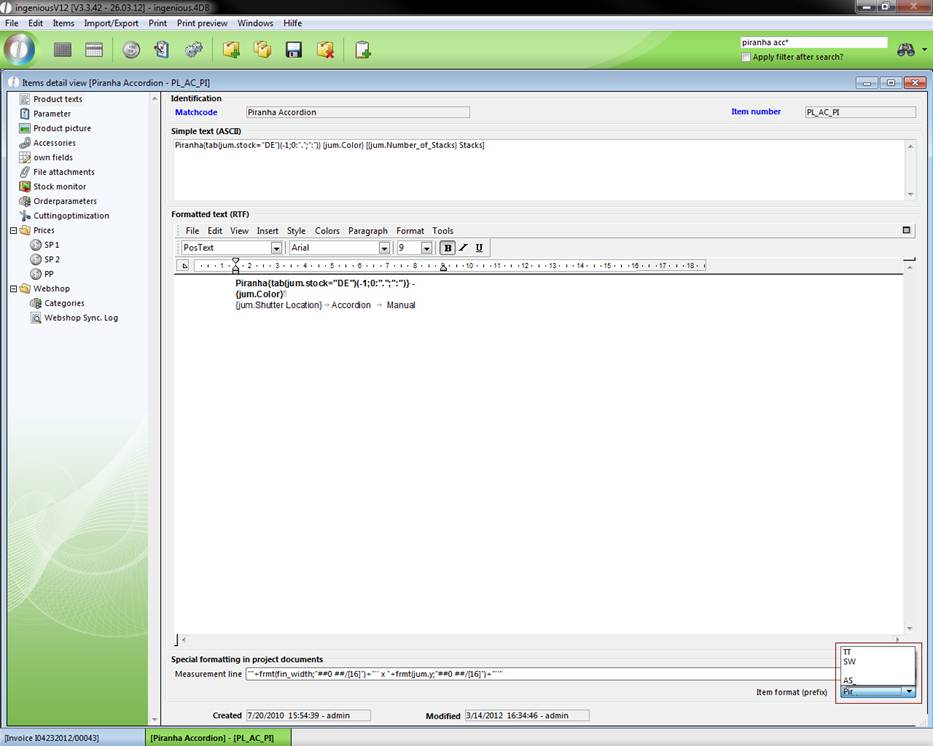
To be able to apply the provided position format prefix, enter the self-created prefix under the “Prefix position format” using the module option, “Product catalog” in the program settings in the “Selection lists” column.
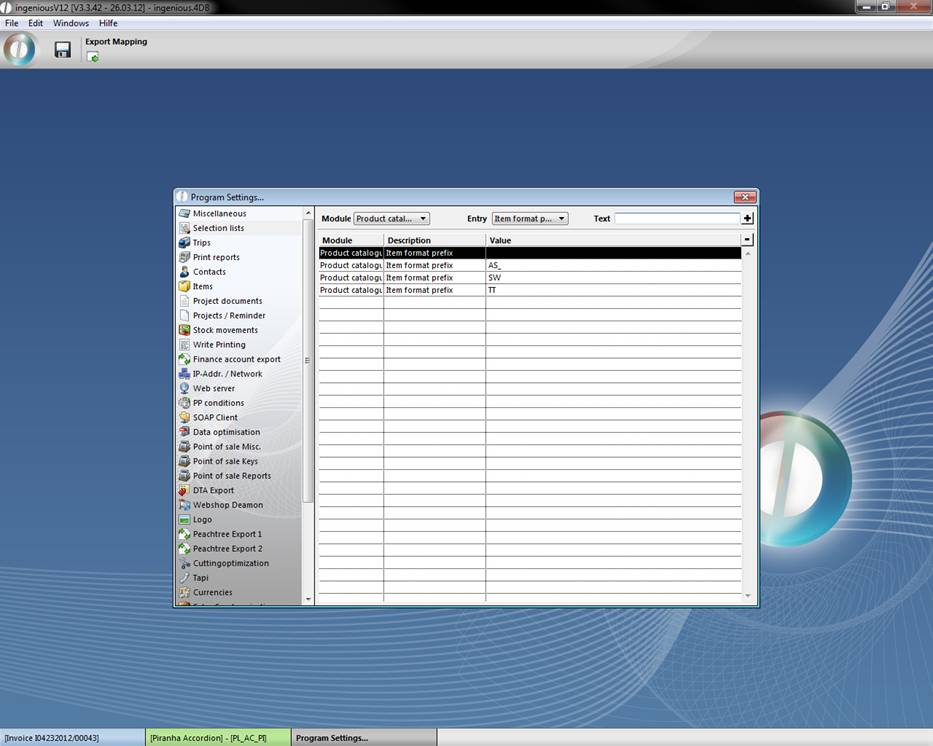
Now you can choose the desired prefix in the article detail view in the “General” column in the “Item format (prefix)” column.
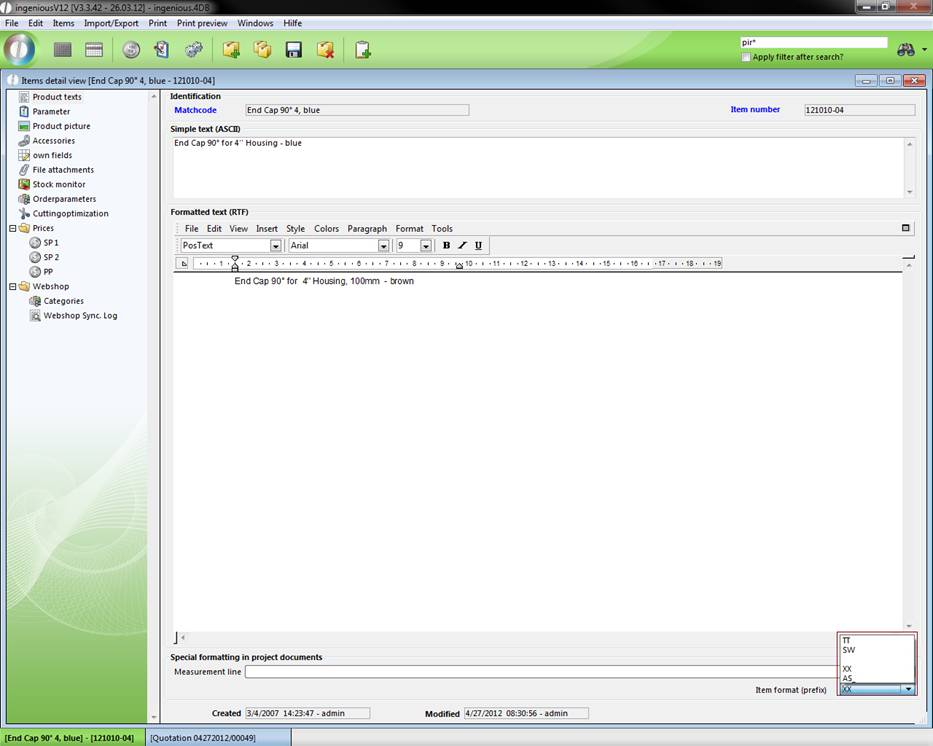
If the article is now printed in the project documents, the article text edition takes on the provided formatting.

Project templates
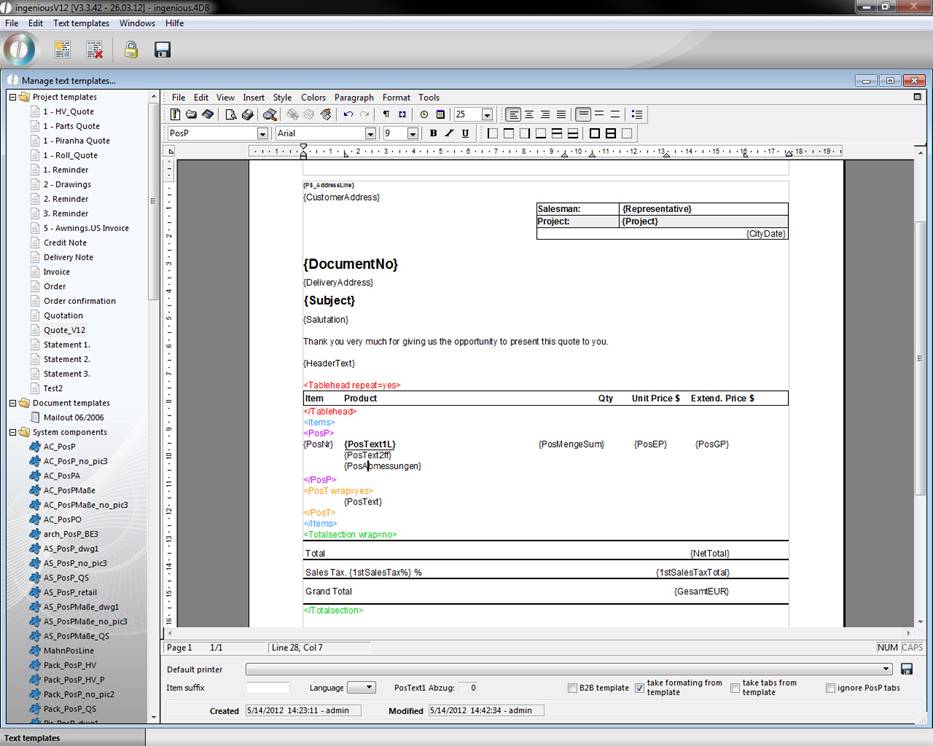
Since ingenious.V12 a new additional system is included, that makes the process of creating print templates easier and more intuitive, by putting the system components directly into the template.
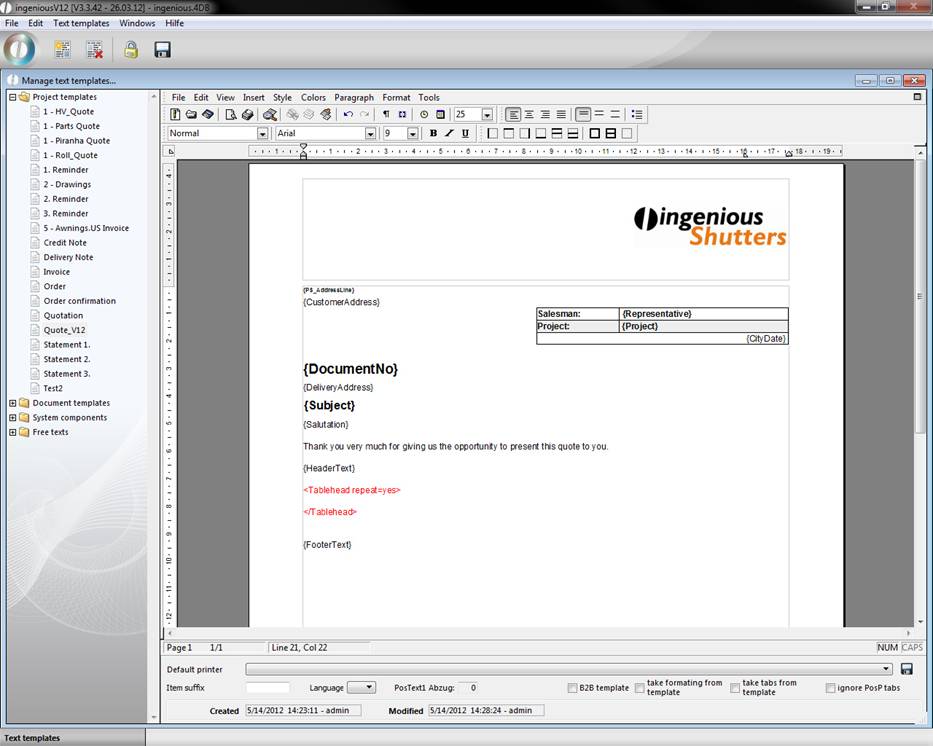
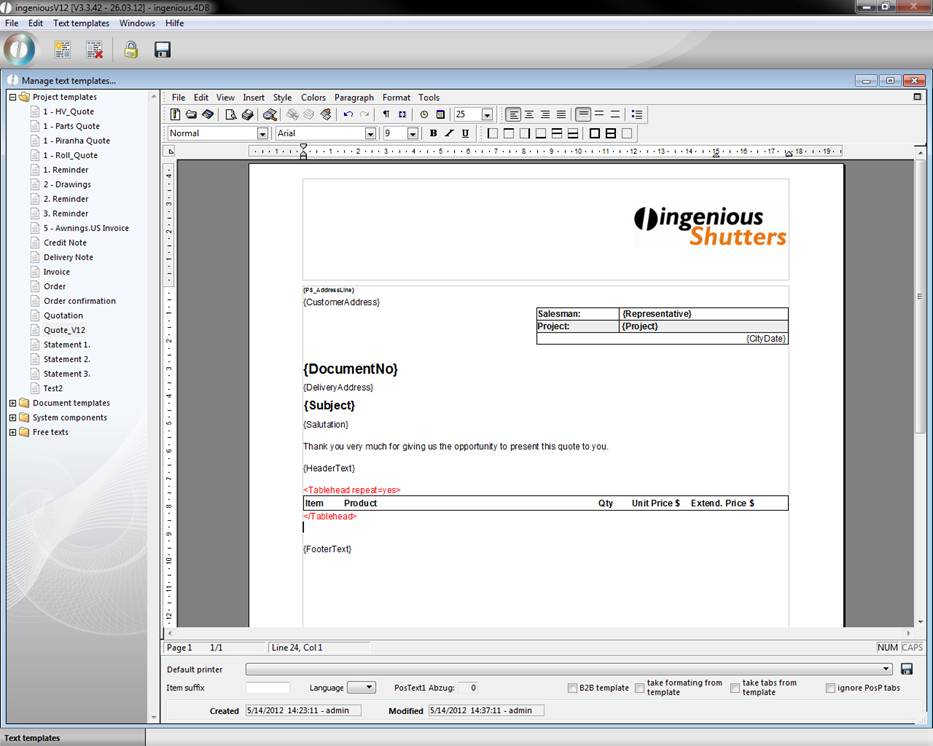
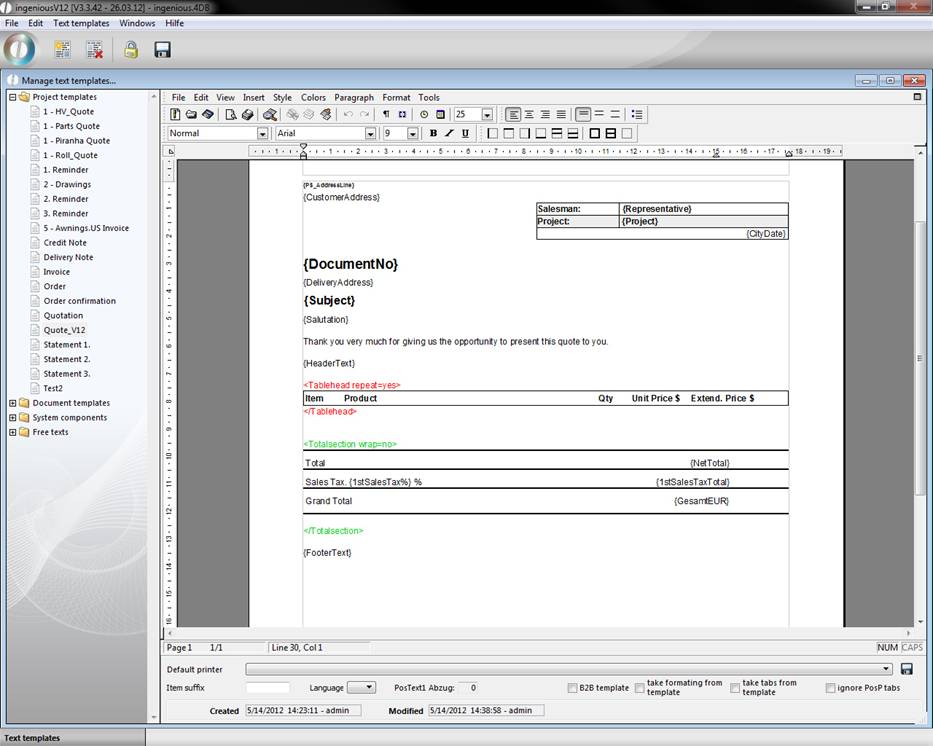
The new system based on so called “tags”. Each area is surrounded by an opening tag (“<Tag name>”) and a closing one (“</Tag name>”). There are three reserved main areas: table head (<Tablehead>…</Tablehead>), items (<Items>…</Items>) and the sum block (<TotalSection>…</TotalSection>).
Tags can be extended with two attributes:
“repeat” – repeat tag on every page of the printout
“wrap” – interrupt content by a page break is allowed or not
Tablehead
In this area you define the illustration of the tablehead in the item view. You can use the attributes “repeat” and “wrap”.
Items
Here the style of the different item formats, like PosP, PosT, etc. is defined. Therefore you have to add tag-areas named by the corresponding item format to the items-area. i.e.
<Items>
<PosP>
…
</PosP>
…
</Items>
For the items tag no attributes are allowed, but you can add the wrap attribute to the item format tags.
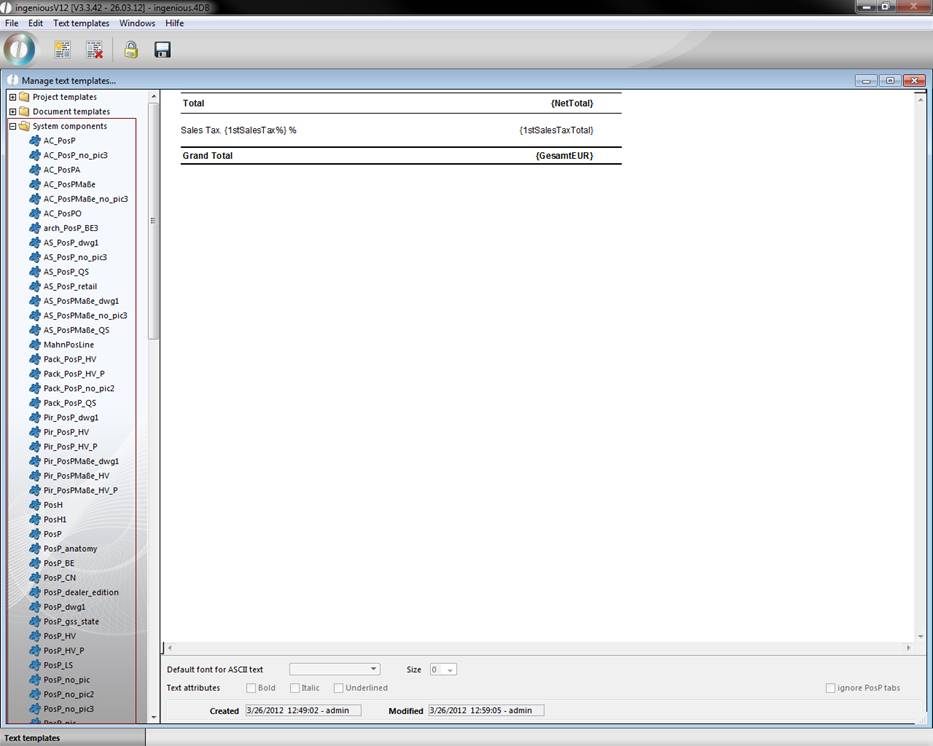
Totalsection
In this area you define the style of the sum block of your item view. You can add the attribute “wrap”.
Practice
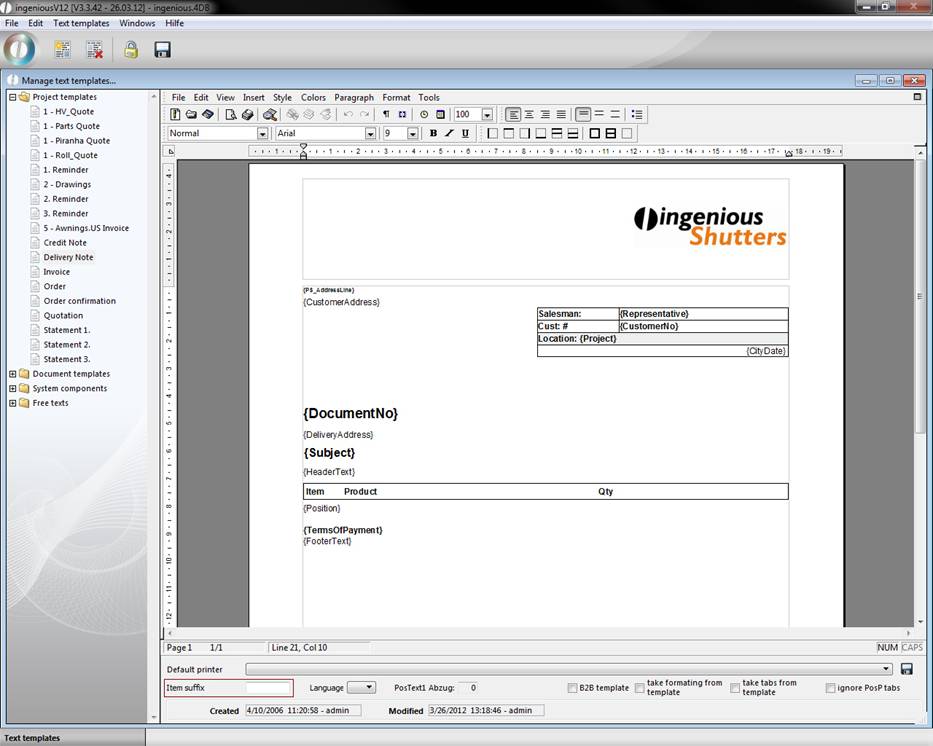
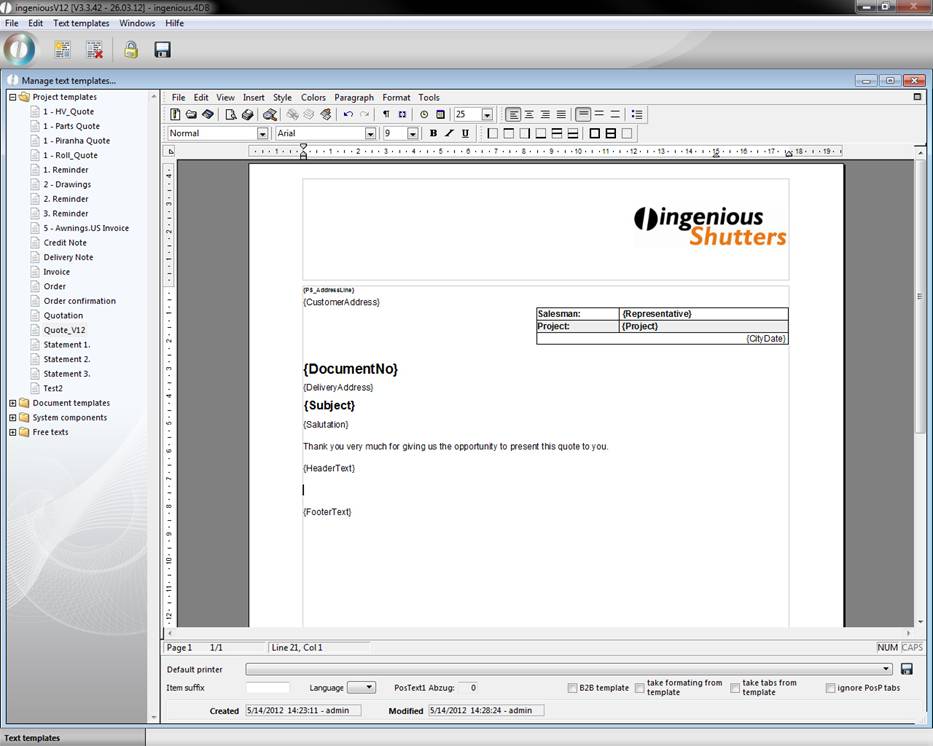
Select the folder “project templates” in the selection area of the Text templates module and click on ![]() to create a new print template. In the dialog you have to enter a name for the document, like Quote_V12.
to create a new print template. In the dialog you have to enter a name for the document, like Quote_V12.
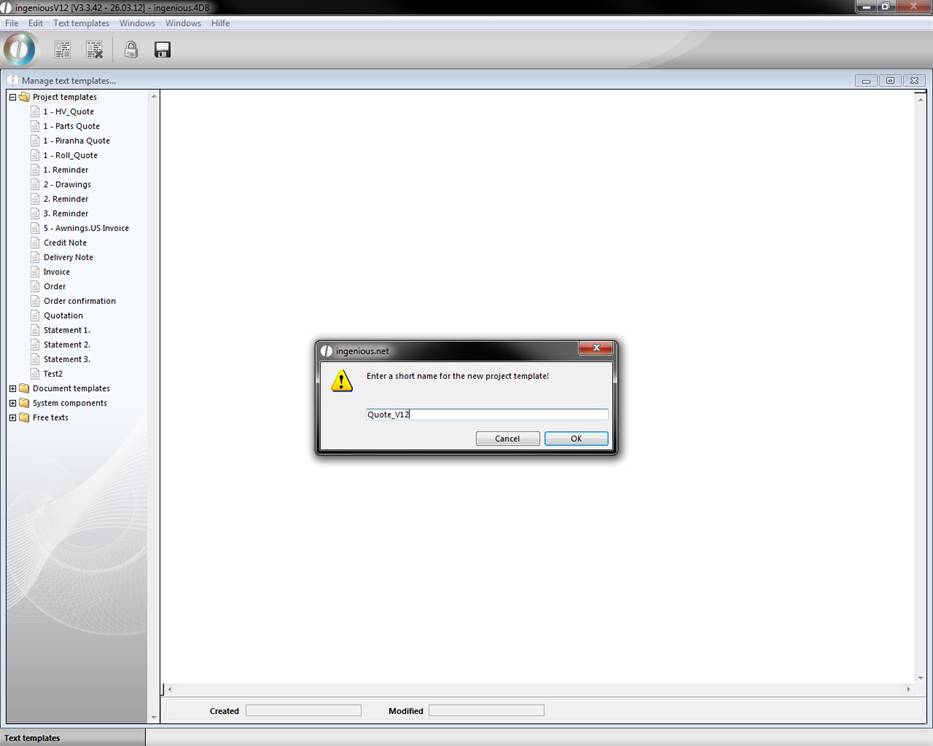
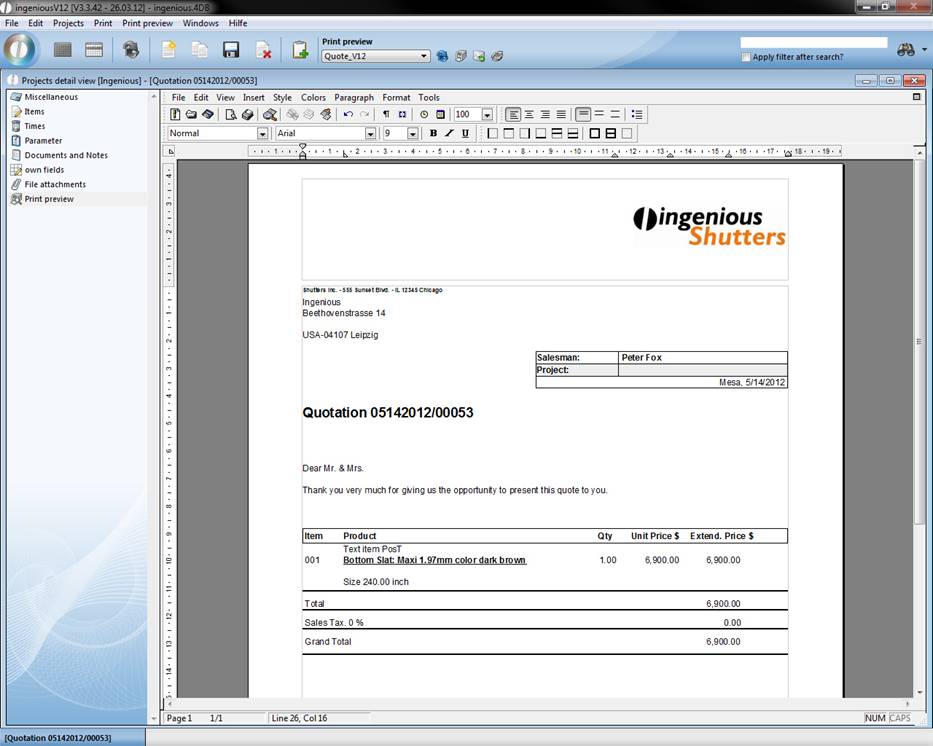
By pressing “OK” the new template will be created and is displayed in the list of the project templates in the selection area. Afterwards the new template is already selected. (select menu -> view -> page to view the document in page view)
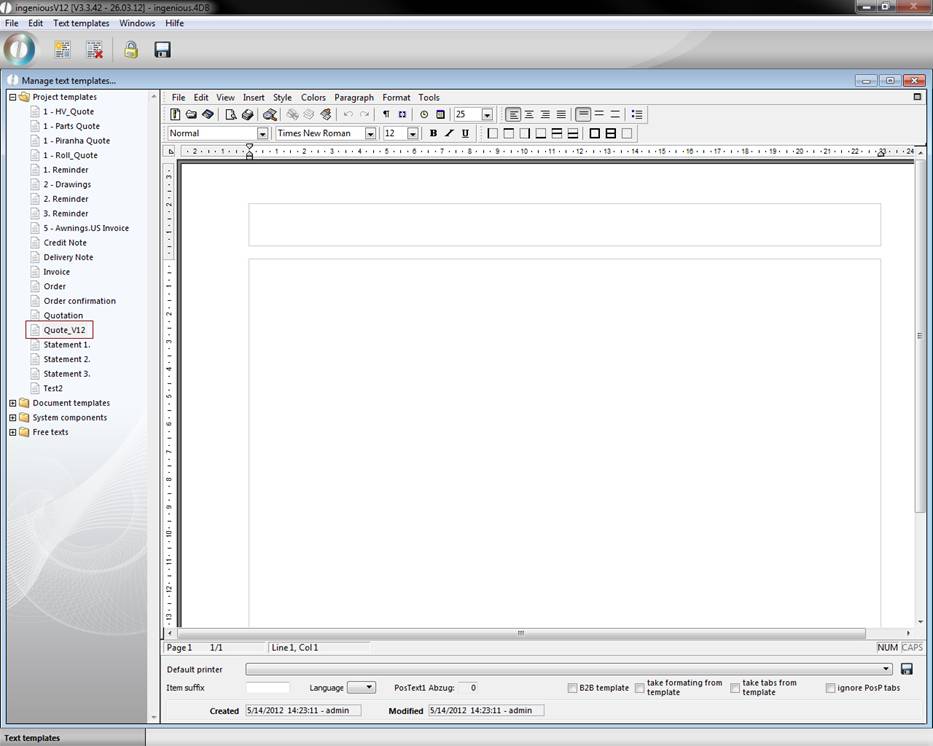
Now you can modify the document.
To add a tablehead area, just add “<Tablehead>” to your document. The closing tag will automatically be added.
Hint: For a better overview it is useful to color the tag pairs differently.
Feel free to add the attributes “repeat=yes” resp. “repeat=no” and “wrap=yes” resp. “wrap=no”. (Otherwise the default value “no” will be used)
Analogous you can create the sum block.
After you add the items-tag, you can define the desired item formats. Here we created styles for the PosP and PosT format.
Additionally the field “Take formatting from template” was checked so the formatting of the placeholders will be used for the inserted texts.
Document templates
The folder “Document templates” contains all other documents that are needed for normal correspondence. Some templates provided by Ingenious.V12 are included here, but you can of course also provide your own templates. The document templates are applied in the “Contacts” module as well as in the standard serial letter assistant.
System components
As the name already suggests, this “Module” folder contains “components”. With their help, numerous documents can be created quickly and easily. This is how the document templates are placed together out of more system components for example. The system modules differ because of the integrated placeholders of the “Free texts”. These placeholders give the system components their functionality. They refer to certain values of the record and are replaced by the printing of the document with the suitable value.
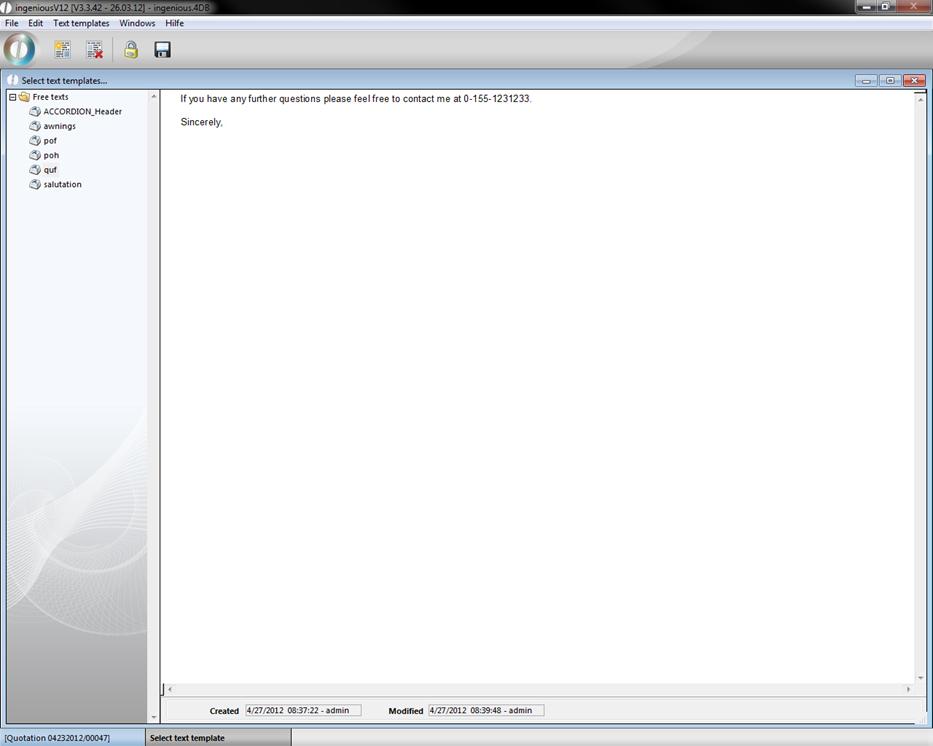
Free texts
The “Free texts” folder contains as many abbreviations as possible, which should save the user the work of writing. Often used text phrases such as “Sincerely Yours” can be therefore simplified. The “Free texts” are primarily used during the creation of the project documents in the header and footer. Within the texts, placeholders are also used. Also, you of course have the possibility to provide your own free texts here.
Creating and editing text templates
Now you will create your first text module in Ingenious.V12.
Practice creating text modules
-
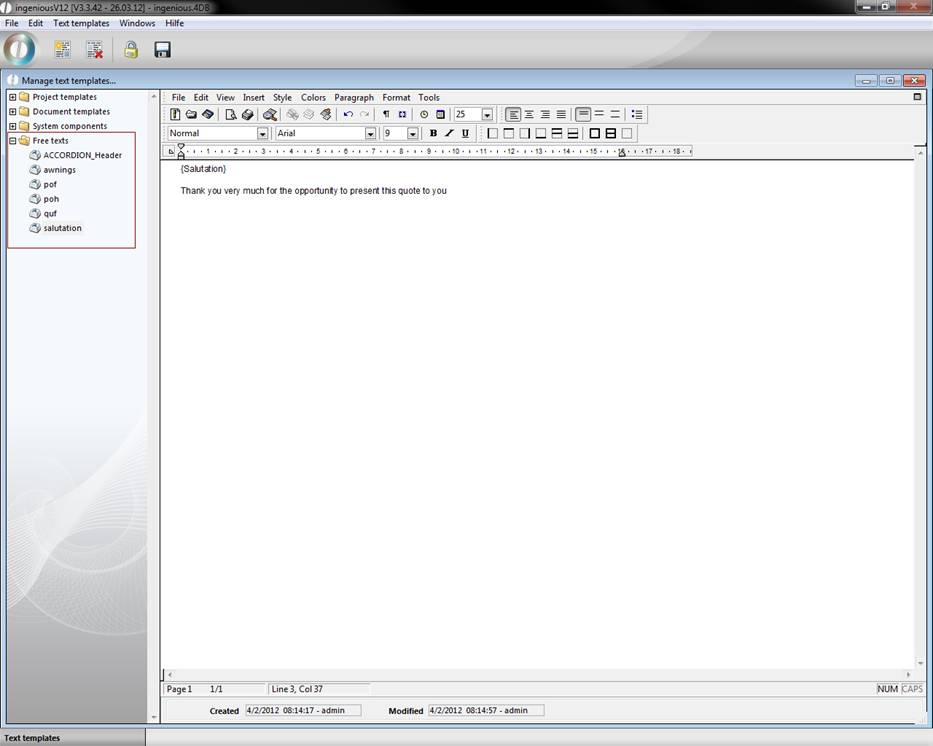
Because a text module is always provided in the active group, we first select the group (folder) “Free texts” with a mouse click and click on the button.
-
A window appears around the new text module to give the new text module a name. Enter “quf” and confirm with “OK”.
Attention! The names of the text modules may not contain “.” (Points) because this later leads to disturbances when importing and exporting.
-
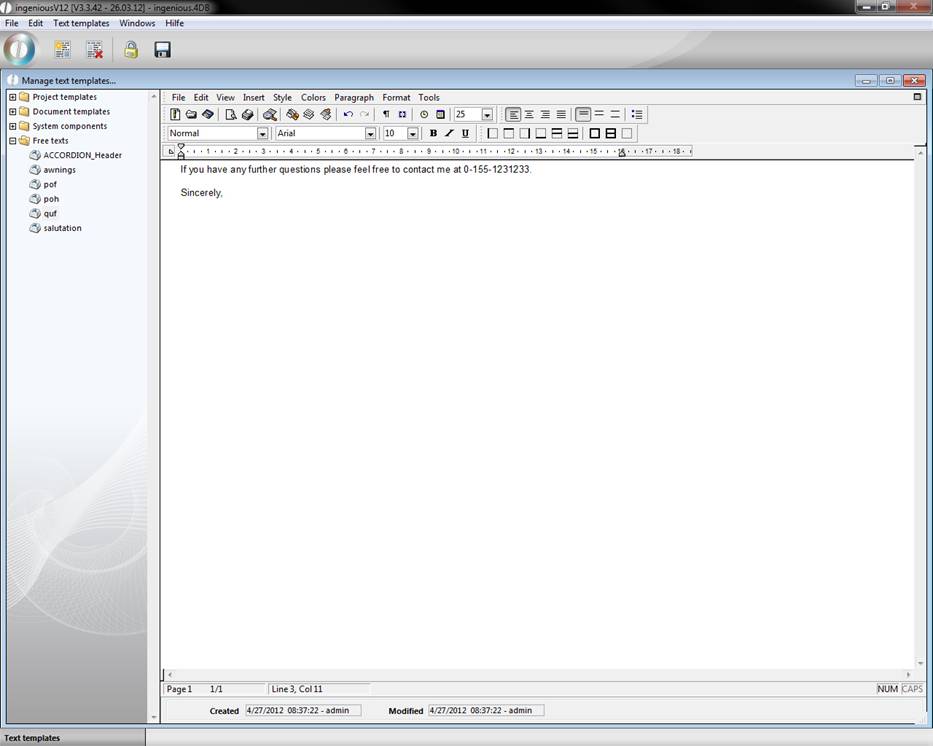
On the right side of the window, you can enter the full text for your text module.
-
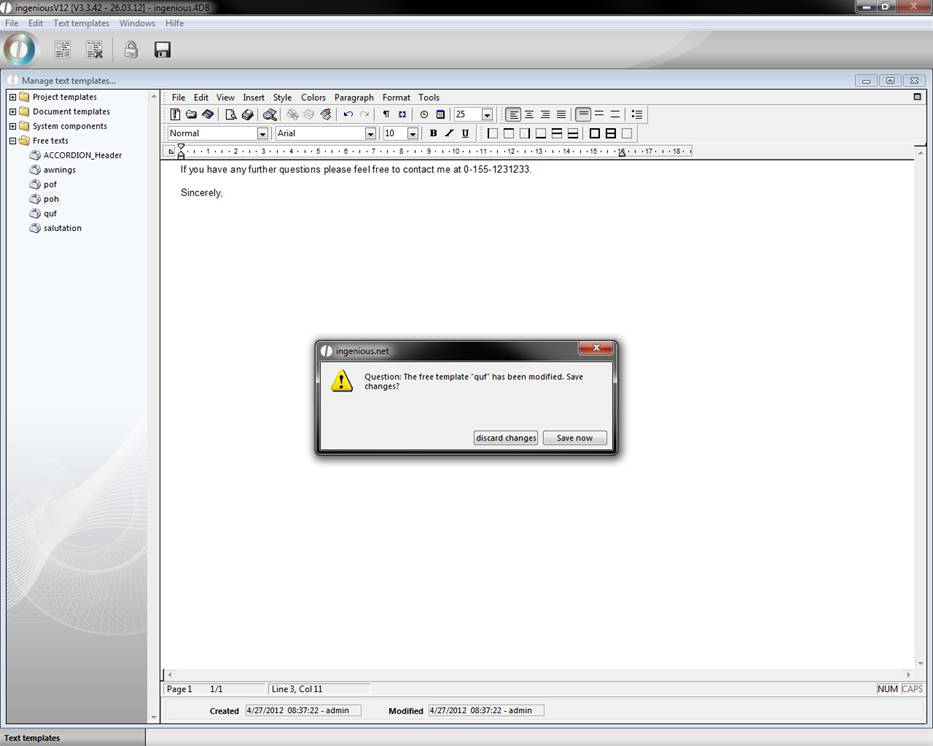
With a click on you can save your text template.
-
If you want to now click on another text module or leave the text template administration, a query window in which you confirm with “Save now” appears.
-
In order to change this text module again, you must mark first the text module in the left tree diagram with the mouse and then click on the button. The button serves to delete a marked text module.
Tabs
The assignment of tabs during the creation of text modules is almost an absolute must. Tabs are steady document marks in which texts can be adjusted. These so-called TabStop's can be immediately controlled with the tab key (↹). In order to better understand the contact with tabs, an exercise follows.
Practice using tabs
-
Open the text template administration and enter a new text module with the description “Practice” in the “System components”.
There are two ways to set a tab. The easiest one is to click with the mouse on the desired (horizontal) side position of the ruler shown on top. On the ruler, the tab is usually shown with a small triangle.

Another way to create tabs is with the menu entry, “Format/Tabs...” or the key combinations CTL + ⇧ + T.
-
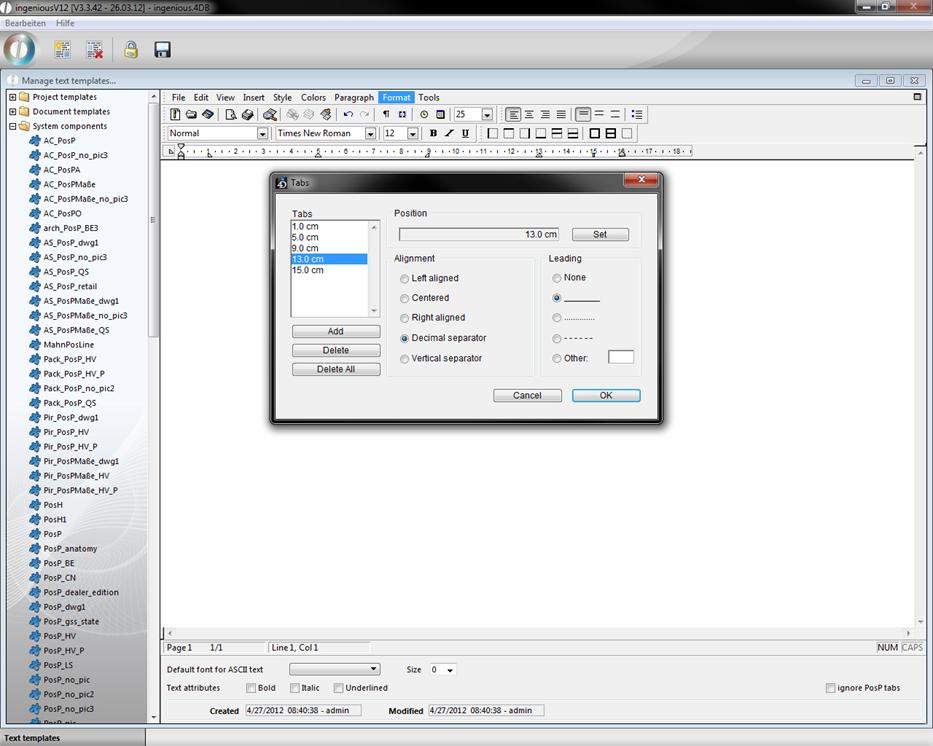
Choose the menu entry “Format /Tabs …”. In order to provide a tab in this menu, you must first click on the key “Add”. Now a tab with the position of 1 cm is automatically set.
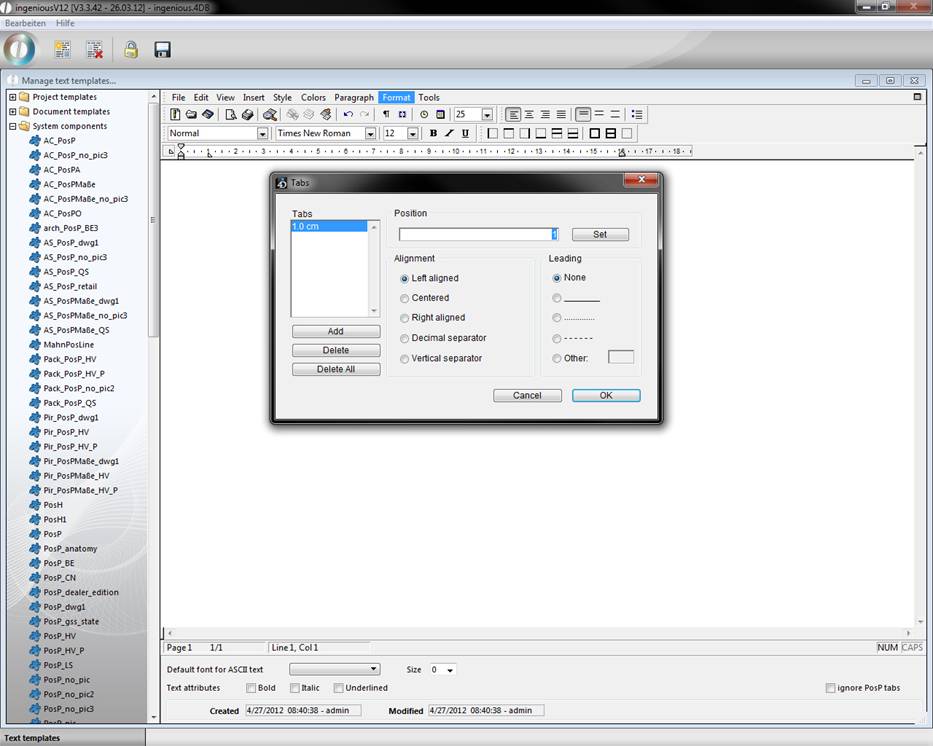
In the area „Items“ the centimeter values (according to the ruler) are specified from the left border and the button “set” is clicked to position the tabulator at the desired place. Thereafter you could choose orientation and/or leading characters. In Ingenious.V12 there are five different orientations of tabulators with suitable tabulator symbols:
-
Create the following five tabs:
1.0 cm Left justify
5.0 cm Center
9.0 cm Right justify
13.0 cm Decimal comma
15.0 cm Vertical lines
-
Mark the tabulator 13.0 cm and select the continuous line in the “Leading” area.
-
Now click on the “OK” button in order to insert the text modules.
Now the ruler has the provided tabs.
-
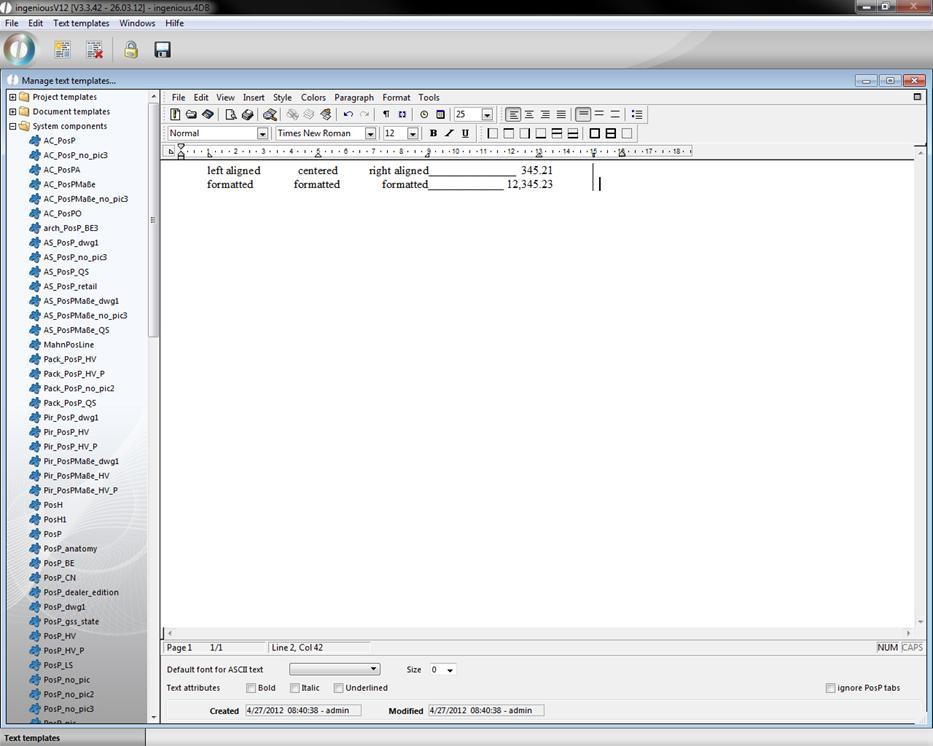
In order to also test the formatting of the tabs / to understand, update the following entry on your keyboard:
Tab Key (↹) “left aligned”
Tab Key (↹) “centered”
Tab Key (↹) “right aligned”
Tab Key (↹) “345.21”
Tab Key (↹) Enter-Key (↲)
Tab Key (↹) “formatted”
Tab Key (↹) “formatted”
Tab Key (↹) “formatted”
Tab Key (↹) “12,354.23”
Tab Key (↹) Enter-Key (↲)
The text module now looks as follows:
The shifting of the tabs is possible directly in the ruler. Simply click the desired tab with the mouse and shift the desired position in the ruler with the mouse key. However, it is also possible to shift a tab with the help of the menu “Format / Tabs …”. In addition, you simply click the desired tabs from the “Tabs” list and change the cm number in the “Position” area. Afterwards click on the “Set” button.
-
Put the cursor in the first line and shift the tab "15.0 cm” by clicking and pull it in the ruler on the 14.0 cm position.
Now you see that only the tab has changed in the first line. The tab (and the vertical line) in the second line is unchanged.

View after the shifting of the tab
That's why in the future you should first thoroughly consider which tabs are necessary in the document / text module, before you create this. In order to delete a tab again, there are two different possibilities in Ingenious.V12. The easiest is to click the tab icon in the ruler and to pull the document with the mouse (down), until it is shown light grey. If now you let go of the mouse key, the tab completely disappears. You can also delete tabs with the help of the “Tabs” menu…” (“Format / Tabs…”). Simply select the desired tab from the “Tabs” list and afterwards select the “Delete” button and click on “OK”.
-
Place the cursor on the second line and delete the tab 15.0 cm with one of both previously described methods.

View after deleting a tab
-
At the end of this exercise, please delete the “Practice” module with the button.
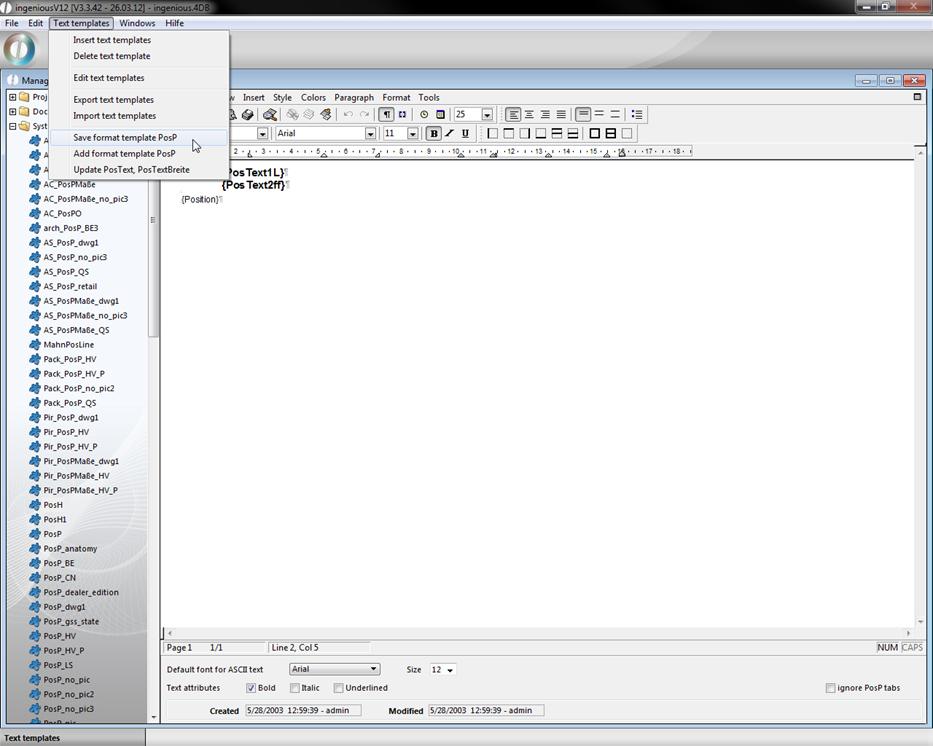
Save and apply the tab sequence PosP
The number and the settings of the tabs build a single tab sequence line by line. One can store such a tab sequence with the menu entry “Text templates / Save format template PosP” in the clipboard. One can later duplicate this tab sequence with the menu entry “Text templates / Add format template PosP” on one or multiple lines.
Practice with the PosP tab sequence
-
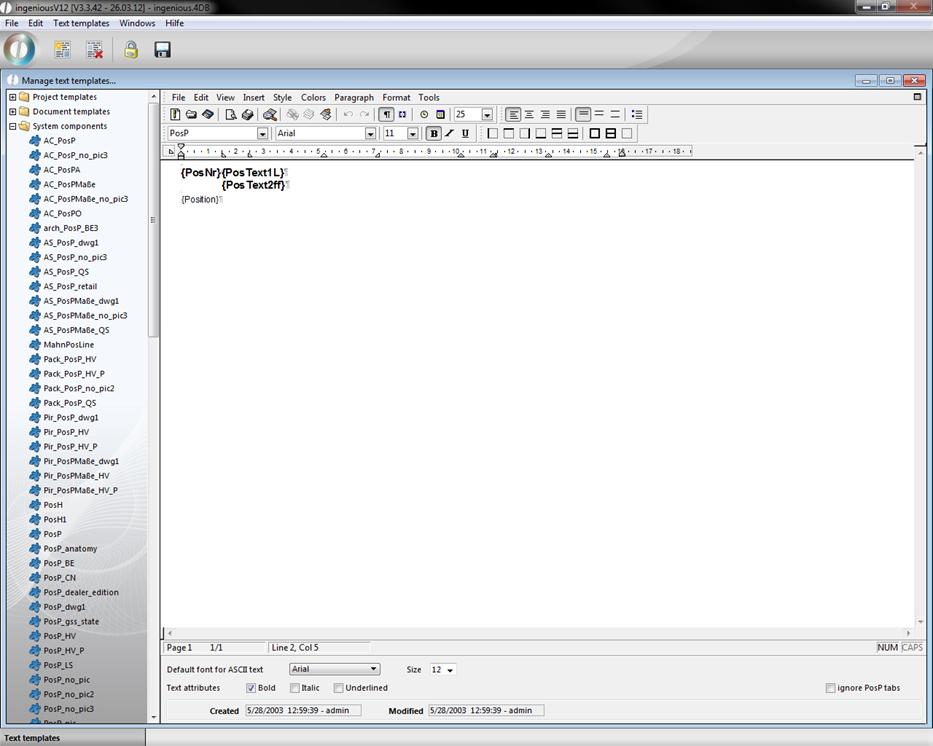
In the text template administration, select the text module “PosH1” from the “System modules” folder and click on the button in order to reach the text templates in the editing mode.
If you now place the mouse's cursor in the second line, you get the different tabs (sum = tab sequence) indicated in the ruler.
Choice of a text template
-
Save the tabulator sequence with the menu item „Save Text templates/Format template PosP”.
-
Now place the cursor behind “{Position}” and create a new line with the help of the Enter key (↲).
-
If available, remove complete tabs from the ruler.

New line with a blank tab sequence
-
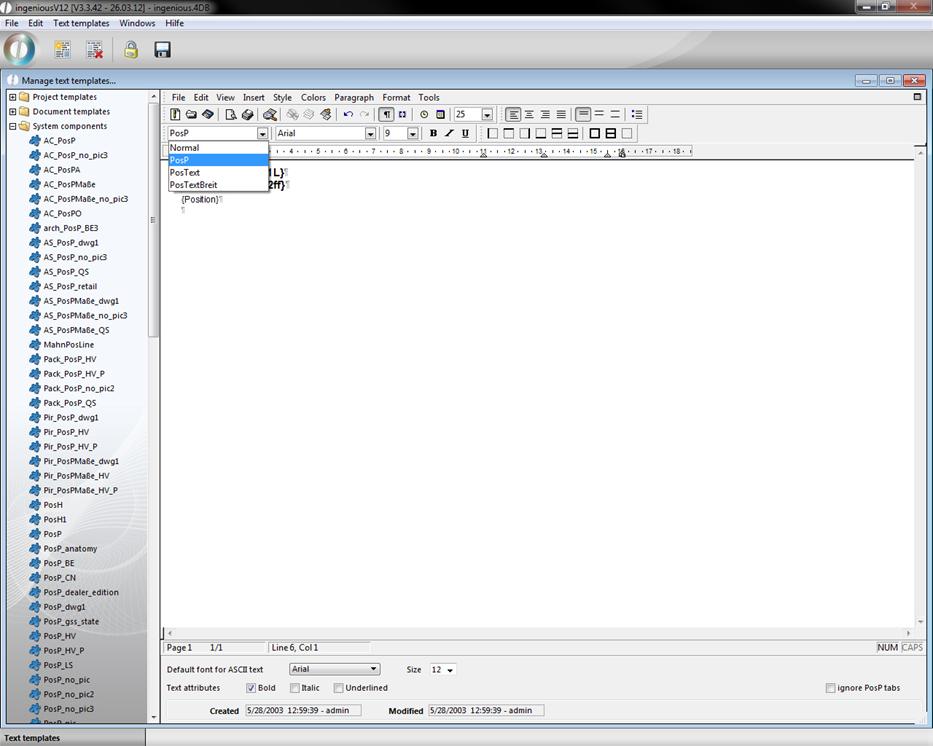
Now choose the menu entry “Text templates / Add format template PosP” to set the saved tabs in this line.
Update PosText, PosTextWidth
The menu entry “Text modules / Update PosText, PosTextBreite” adds the style templates “PosText” and “PosTextBreite” to the already existing “Normal” and “PosP”.
Menu according to update PosText, PosTextWidth
You can create, edit, delete and apply your own style templates under “Format / Style sheets …”.
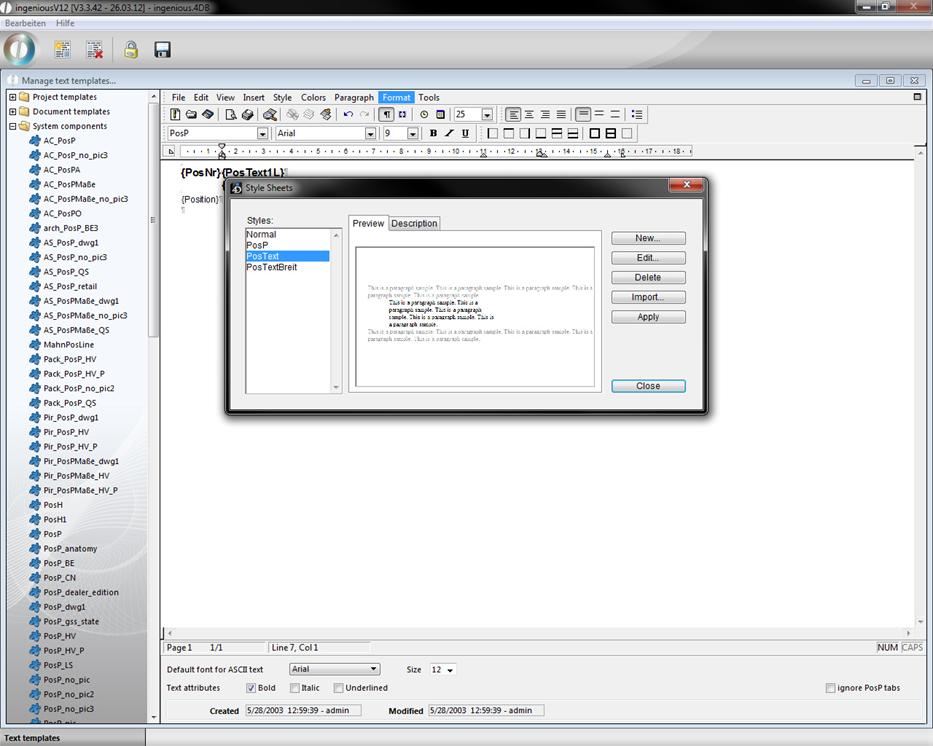
The import of style sheets is also possible in this menu.
The application of text templates
The sense and the purpose of a text template is to save the user from constant paperwork, such as reminders, for example. For this reason, the procedure to insert a text module into a document was made as easy as possible in Ingenious.V12.
There are two ways to insert a text template.
-
With the cursor, go to that part of the document in which the text template should be inserted.
Positioning of the cursor
Option 1 :
-
If you know the name of the text template, enter it now in the text, i.e., “quf”.

Entry of the text module description
-
Now press the F3 key on your keyboard in order to direct Ingenious.V12 to enter the text module.

The text module is automatically started and closed by Ingenious.V12.
Option 2:
-
If you do not know the name of the text module, now press the F3 key of your keyboard.
-
The window “Text template administration…” opens in which all free texts from Ingenious.V12 are listed. Select the desired text module with the mouse and double click it.
The text template administration closes again and the selective text module appears at the suitable place in the document.
4D expression and references
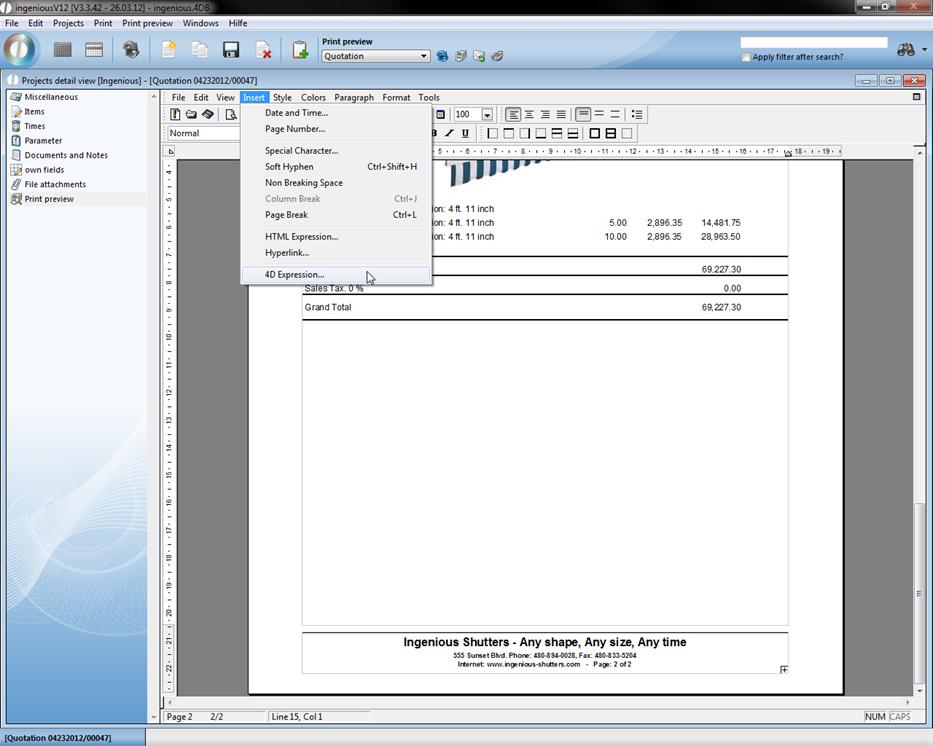
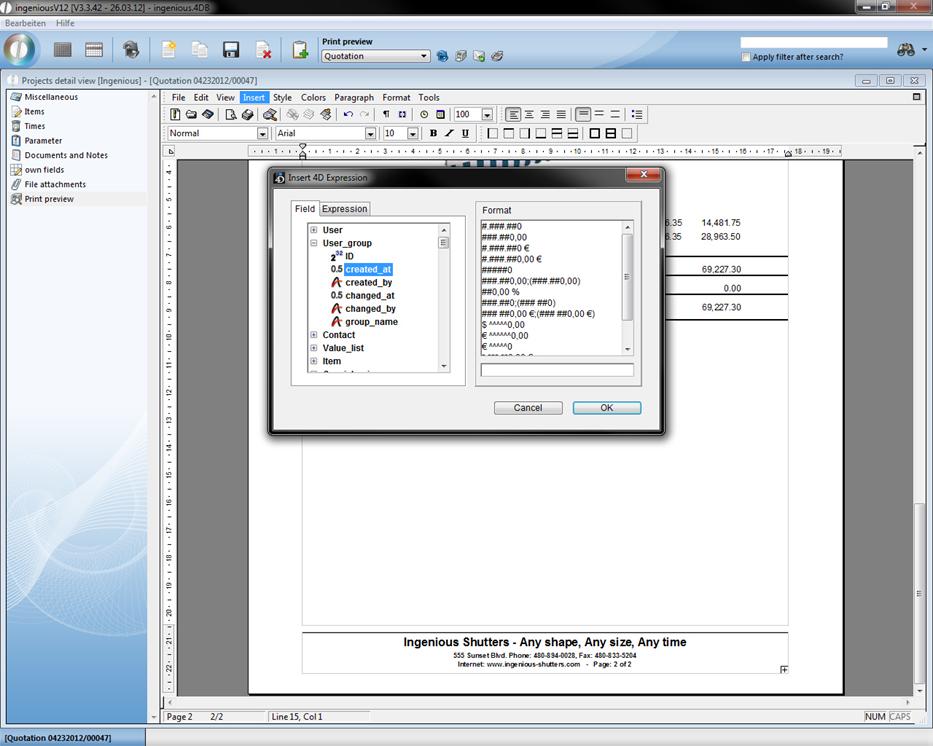
A “4D Expression” serves to incorporate values of fields from the database into the document. They therefore create a reference to the Ingenious.V12 database. This is very helpful, i.e. with serial printing and with the creation of calculations. If you select “Insert / 4D Expression”, the window “Insert 4D Expression” automatically opens. If you have entered a printout, you can show the references with the “Display/References” menu.
Subsequent example with discount invoices:
a) with Ingenious.V12 placeholders
Payable within {NetPaymentTerm} less days from {Discount} % discount (discount amount:{DiscountTotal}Please transfer the following value: {totalEUR}-{DiscountTotal}.
b) with the help of “4D Expression” and “References” from the database
Payable within «[Main Projects]Net payment term» less days from «[Main Projects]Discount» % discount(discount amount: «[Main Projects]Discount *[Main Projects]Gross_EUR)/100:#.###.##0,00 €»). Please transfer the following amount: «(([Main Projects]Gross_EUR*1,16)/100)*(100-[Main Projects]discount):#.###.##0,00 €».
Shown in the closed project:
Payable within 10 days less 2% discount (discount amount: 2.32€). Please transfer the following amount: 131.86€.
Export and import of text templates
Of course exporting or importing text templates is also possible in Ingenious.V12.
Exporting text templates
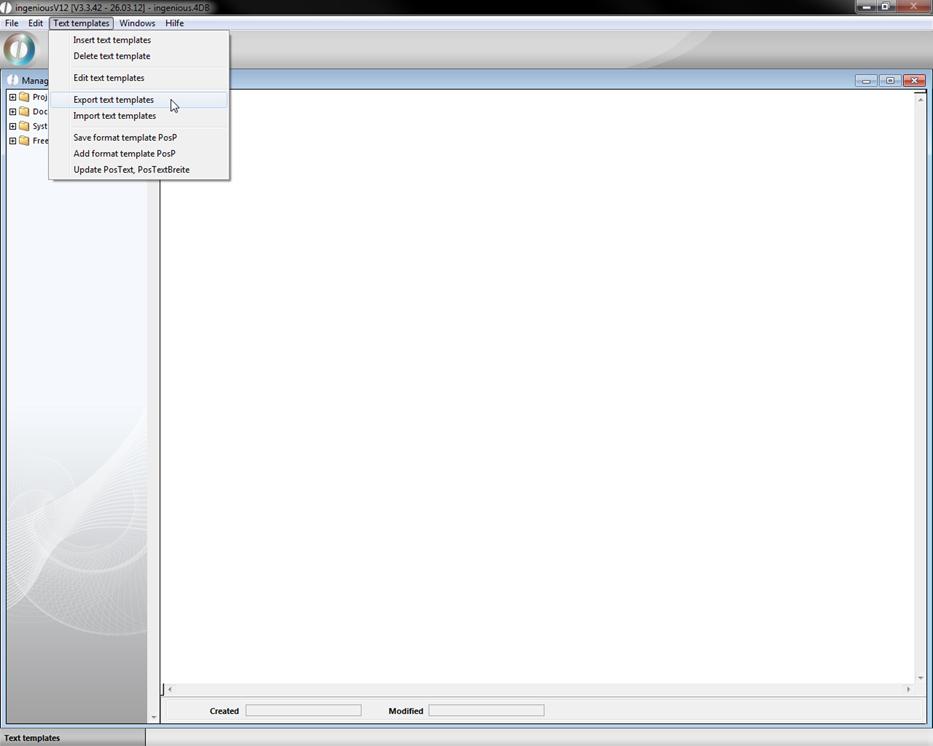
Indeed, no single text template can be exported, but only complete folders with text modules, such as “Project templates”, “Document templates”, “System components” or “Free texts” can be exported. In order to do this, please select the entry, “Text templates / Export text templates” in the main menu in the open text template administration.
In the next window, first select the target folder in which the text modules should be exported, with the help of the ![]() button and the next window that follows. In addition, you still have the choice as to which folders (“Project templates”, “System components” or “Free texts”) you want to export. Normally all folders are provided with a green checkmark. In order to exclude one or several folders from the export, simply click on the respective entry, so that the checkmark located before it changes into a cross. Now you must click only the button “OK” and the export begins.
button and the next window that follows. In addition, you still have the choice as to which folders (“Project templates”, “System components” or “Free texts”) you want to export. Normally all folders are provided with a green checkmark. In order to exclude one or several folders from the export, simply click on the respective entry, so that the checkmark located before it changes into a cross. Now you must click only the button “OK” and the export begins.
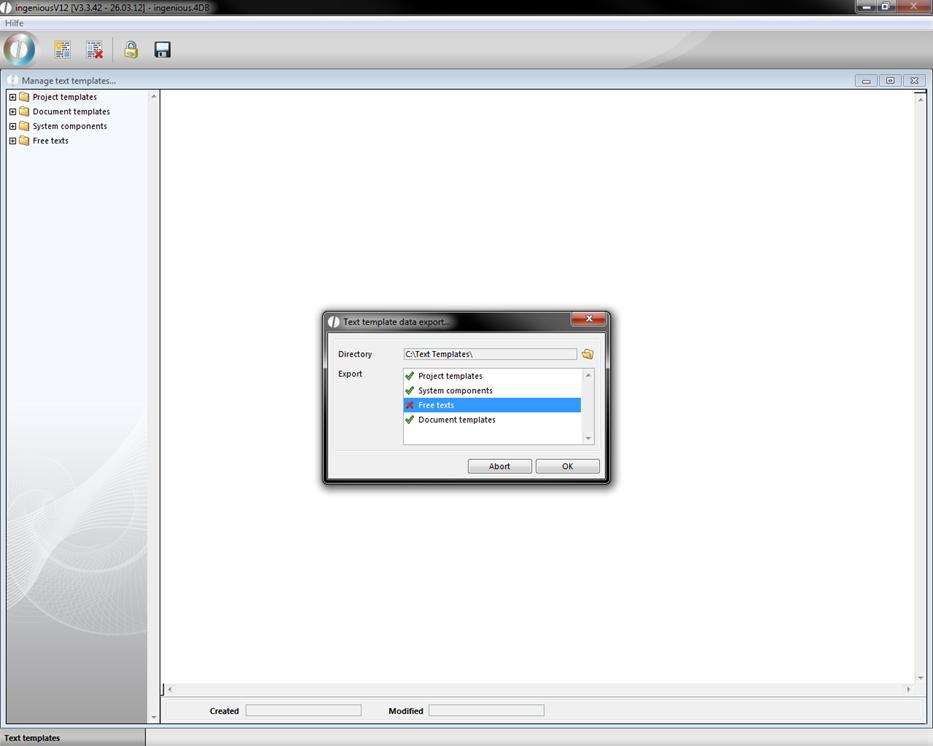
Note: Export of data is similar to the copying of data. This means the data are still found in your system, they are not shifted or are not even deleted.
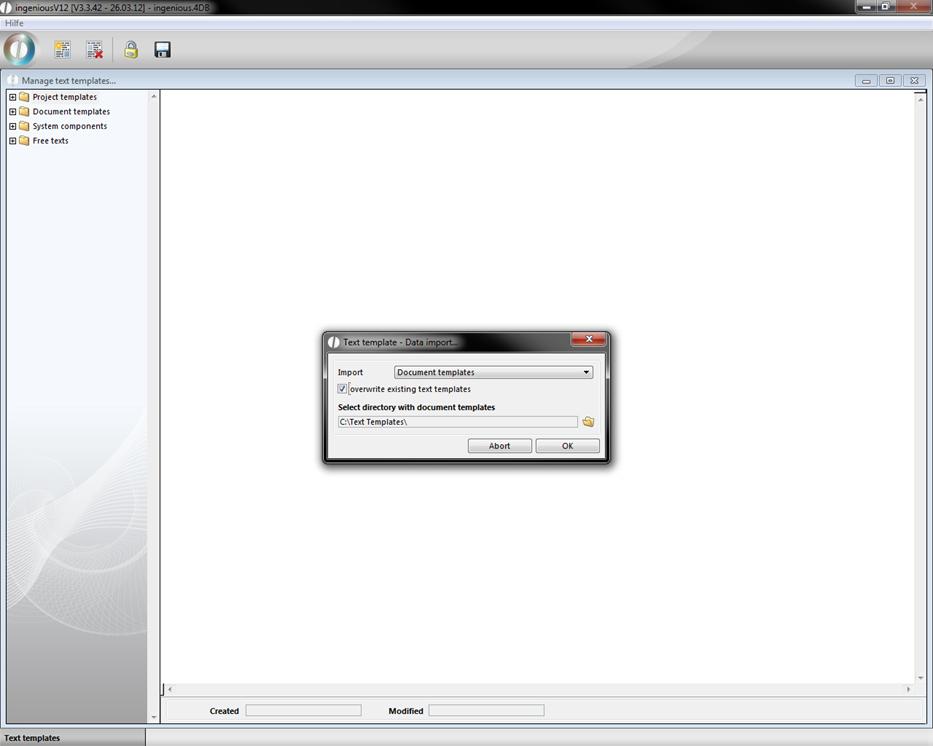
Importing text templates
The import of text modules differs only slightly from the export. Next select the main menu entry “Text templates / Import text templates” with the opened text template administration. The window that appears differs only by the pop-up field “Import” and the selection field “Overwrite existing text templates” from the text templates export window. Now one provides a path with the ![]() button by which the text templates should be imported. Only complete folders (“Project templates”, “System components”, “Free texts”) can be selected. With the selection field “Overwrite existing text templates”, you determine whether your already available text templates should perhaps be substituted (overwritten) or not. The text template import is started with the “OK” button.
button by which the text templates should be imported. Only complete folders (“Project templates”, “System components”, “Free texts”) can be selected. With the selection field “Overwrite existing text templates”, you determine whether your already available text templates should perhaps be substituted (overwritten) or not. The text template import is started with the “OK” button.